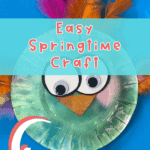
It’s time for a fun and easy springtime craft for your kindergarten or first-grade classroom. But there’s one problem. The watercolor paints you’ve used all year are looking worn and used. Use bleeding tissue paper instead of watercolor paints for this no paint- painting spring art project.
Easy And Colorful Spring Craft
You’ve done flower crafts for Mother’s Day and rainbow crafts in March. And every other kind of spring craft you can think of. You need something easy and something that’s going to use up some of the leftover supplies in your craft closet.
(Does your craft closet look like mine?…. YIKES!!. It’s a glitter filled, crumply, miss matched mess- That’s okay. Creativity is sometimes messy.)
Your Students Need a Unique Springtime Craft
Now you need something fun but easy. Let’s face it, you’re tired and they still have energy to burn. This needs to be a craft that takes them a while and is easy prep for you.
It also needs to be unique and flashy. Parents and admin are going to be dropping in now more than ever and it always feels good to have a cute little art project up.
A No Paint Painting Spring Art Project
In order to have a unique and flashy project you’re going to have to get out some paint. Are you up for it? Nope— Me either.
Prepping tempera paint is a lot of work and at the end of the school year there’s just a lot of projects begging for your time. And have you seen the watercolor sets? They are well used and each little pod has taken on a brown baby poo hue that is not going to work for this bright and cheery spring art project.
So what’s a teacher to do? Use bleeding tissue paper to “paint.”
But it has to be “bleeding tissue paper” or else it’s not going to work. Keep reading to get all the tips and tricks to this fun spring art project.
What Is Bleeding Tissue Paper?
In short this type of tissue will release it’s pigment when it comes in contact with something wet.
When I first set out to do this project I made a big assumption and a costly mistake.
My assumption was that all tissue paper when covered in water would release it’s ink.
That led to the costly mistake of cutting up a bunch of cheap tissue I got from the Dollar Store. I wasn’t able to use it. Boo Hiss!!!
There’s a difference between craft tissue paper and bleeding tissue paper. Craft tissue paper won’t release its ink when wet. Which is nice when using glue or any other wet adhesive when doing an art project.
But what if you want it to bleed? That’s when you need “bleeding tissue paper”. And yes, it should say “bleeding tissue” on the package. This stuff is super cool and I can see a bazillion different uses for it in your kindergarten and first-grade classroom.
If you’re asking “Where do I buy bleeding tissue paper?” I have the bleeding tissue paper amazon link in the materials section below for your ordering convenience. Don’t make the same mistake I did and think standard craft tissue is going to bleed. It won’t.
More Projects With Bleeding Tissue Paper
Here are a couple projects I found around the internet with bleeding tissue that you may also like:
S&S Blog– Crayon Resist and Bleeding Tissue Art Project
HGTV– Fun project using a canvas and bleeding tissue
Steps- Easy Spring Craft Using Bleeding Tissue To Paint
Here’s the easy step-by-step directions for this unique art project. Just download the directions and have them available for when you are ready. Save the directions for next year so you are ahead of the game. And don’t forget to order some bleeding tissue for next year too. Once you do this with your students you are going to use it in your classroom again and again.
We’ve hinted to the condition of the craft closets of every Kindergarten or first-grade classroom across the world… It’s scary. Why? Because there’s a little bit of this and a little bit of that. Well teacher friend let’s use up some of those supplies.
Paper Plates
Gather up the few materials you need. Each kid will need 2 paper plates of equal size. This is a great time to use up those extra paper plates that you have around. It doesn’t really matter the size. If you have a kiddo who is a slow worker during art projects they get a couple small plates.
Bleeding Tissue, Water and Paint Brush
Cut the bleeding tissue paper into squares. The bigger the square the easier it is for little fingers to handle. Tissue paper can be one of those materials that kids get frustrated with. It takes a little fine motor skill and practice. So if they are young give them bigger pieces. If they are older then give them smaller pieces.
If you want, give them strips and they can cut their own squares or shapes.
They will also need a cup of water and a wide-ish paint brush. They’re going to need to get some serious water onto the tissue so a scrawny watercolor brush isn’t going to work.
Pipe Cleaner
Each student will also need a pipe cleaner. This is a great way to get rid of the bent or yucky colored ones you have. It feels so good to use up supplies that were probably headed for the trash.
Materials For The Eyes
To make the eyes you need a piece of white cardstock and something to trace two round circles to make the eyes. A black sharpie or marker to make a thicker line for cutting and accent, and don’t forget the googly eyes. Now’s a good time to use up any googly eyes that you have around. It doesn’t matter the size just use whatever you have.
Feathers
Feathers are one of those classroom supplies you don’t think you need for your classroom but you really do. (Yet another thing they didn’t teach you in college.) I like the multicolored bag of feathers. And using the feathers up is something you do want to do because feathers have an evil way about them.
You think they’re all contained and then you notice your students laughing at you only to find one is stuck on your rump.
(It’s always the sweet girl in class that says “Miss K. you have a pink feather right there.” and she points to her own hind end and covers her mouth with her other hand. Meanwhile the rest of the class is on the floor in peals of laughter…..Good times, good times. Then if you let out a squawk like a chicken you will get the Best Teacher of the Year Award… Just sayin’ -go ahead and squawk. What other job encourages squawking… None. Yet another reason teaching ROCKS!!)
List Of Supplies
paper plates
bleeding tissue cut into squares
cup for water
wide paint brush
pipe cleaner
card stock, googly eyes, black sharpie
glue stick
feathers
stapler
Supply Links For Your Convience
DISCLAIMER: All opinions are always 100% my own. This blog post contains affiliate links. If you choose to make a purchase, I may earn a commission, at no additional cost to you. Please understand that I have experience with, or have seen the value of all of these resources, and I recommend them because they are helpful. Do not spend any money on these products unless you feel you need them or that they will help you achieve your goals. Your support of web site allows us to continue to make content like this. Thank you for the support!
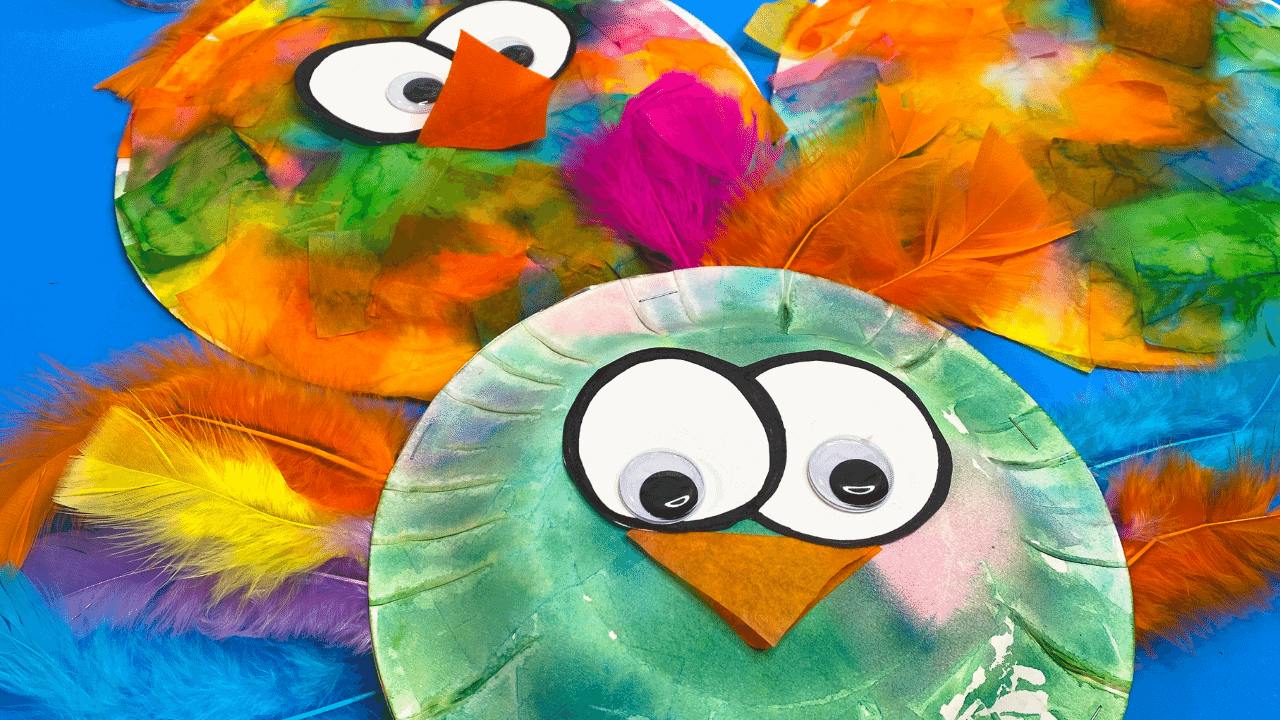
Make the Springtime Bird Craft
Bleeding Tissue -Painting Paper Plates
Using a clean paint brush and clean water, attach the tissue to the underside of the paper plate by applying water so the tissue adheres to the plate.
Use enough water so that the tissue is fully saturated and the pigment starts to run. Overlap the tissue pieces to get the best results.
Make The Eyes
Using white cardstock find a round object to use as a pattern to trace the eyes. Overlap the circles.
Using a black marker, thicken the lines.
Cut on the thick black lines making sure that the eyes stay connected.
Make The Feet
Bend a pipe cleaner in half and bend the ends so that they look like bird feet.
It doesn’t have to be perfect. These little birds get their cuteness because they are unique and quirky- not perfect.
Construct The Body
After the tissue paper and plate have dried, remove the tissue.(Yahoo!!! the plate has been painted by the tissue.) Staple the paper plates together so the painted sides face out.
Make sure the plates are stapled snuggly together. You don’t need a ton of staples but enough so that the feathers will stay secure when placed in the step below.
Attach The Feet
Decide where you want the feet to be and slip the folded end of the pipe cleaner between the two plates.
Secure with a staple.
Attach The Feathers
Simply slide the feathers between the two paper plates.
Place a few on the top and then a few on each side to simulate wings.
Googly Eyes
Glue the white eye background to the bird and then attach the googly eyes.
Is your little bird cute? Yes!!!!
Don’t Forget The Beak
Wait… before your bird does a selfie make sure he/she has a beak.
Cut a square from one of the dried pieces of tissue.
Fold it in half on the diagonal and attach it with glue.
Noooowwww your bird’s ready. So cute!!!
You’re Done
Have fun displaying these cute little birds all over your classroom. They are going to look so cute flying around. Springtime is about joy and color and this craft is all about giving some extra love to your classroom.
Extension- Bird Watching Sight Word Activity
Now you have a whole flock of cute little birds. Sure you could hang them in the hall but first let’s have a little academic fun with them.
Let’s go bird watching. More specifically sight word bird watching. Give students some blank cards for them to write sight words on. Then let them go outside (on a non-windy day) and hide their bird in a designated area. Have them attach the sight word card to the feet or around the area where their bird is nesting. Now let the class go on a sight word bird watching hunt. As they find birds and sight words have them rewrite the words on a piece of paper. What a fun outside activity. Perfect for those days when getting out of the classroom is something you really need to do.
Get Your Directions And Let's See What Your Class Can Come Up With
Yah, let’s get you hooked up with the directions for this fun spring craft using bleeding tissue. It really is the perfect solution to bringing something new and fun to the end of the year. It’s also a winner because you are using up those leftover classroom supplies that you really don’t want to have to deal with when it comes time to pack your classroom away for the summer.
Show Them Off
Show off your birds on social media and tag me @makingthebasicsfun #makingthebasicsfun
Enjoy this cute bird bleeding tissue paper craft. It’s sure to bring fun to your kindergarten or first-grade classroom. If you want more fun and easy art projects check out these posts.
Turkey Craft – More feathers and more googly eyes. This is a cute little rocking turkey.